
Case study - Pump chamber repair
When one of our customers asked us to repair of the chamber of a pumping station we, as normal, paid a visit and using our confined space entry skills soon discovered two horizontal splits near the bottom of the chamber.
Investigations on the first slip found minimal movement had occurred post fracture and that was no obvious water ingress - but that the structure had bulged inwards substantially below the fracture. It also sounded hollow – a good indication of a void behind.
The second problem was a horizontal split immediately below the gravity sewer invert; the structure had peeled inwards below the fracture presenting an open pocket into which the gravity sewer decanted.
By plugging the sewer for a short time we could remove the liquid and faeces from the open pocket and probe into the void behind - this showed that a concrete surround existed, that it was still contoured to the shape of the structure before damage and had remained relatively watertight.
It seemed a weak point or flaw in the structure was a likely cause, the fractures almost certainly occurring after the original installation, rather than as a result of poor installation.
The existence of the concrete surround, which appeared to have some structural integrity, and the lack of water ingress made repair worth considering – especially as the alternative would have been thousands of pounds worth of civil works.
After consulting with plastics industry specialists it was clear that any attempt to force the damaged area back into its original shape would fail - the material was hard and brittle and the risk of further damage was high.
There was little doubt then that the best option was to stabilising and then sealing the split area.
After considering a polythene patch weld, and discarding it as it might weaken the surrounding areas - we looked at the use of Glass Reinforced Plastic (GRP). Unfortunately, the trick with making GRP bond to Polyethylene is to have perfectly clean, chemically etched surfaces and a dry, warm environment.
This was the bottom of a five-meter sewage pit. We had neither
So we totally empted the chamber, plugged off the incoming sewer, and tankered the flow from the nearest manhole. Then we pressure cleaned and dried the working area and slowly raised the chamber temperature with an 110 volt electric heater.
Finally, after filling the void behind the split with an epoxy mortar, we topped it off with epoxy putty and applied a GRP patch over the whole of the area and sealing it with a gel-coating layer.
We’re not sure who choose bright green gel - but it was the finishing touch to a difficult, but highly successful and cost effective repair.
If you have a pumping chamber that needs repairing Contact us.
If you found this of interest why not read our case study on a Pump station refurbishment...
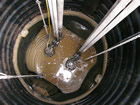
Photo: Chamber before repair
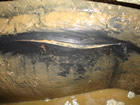 Photo: First split
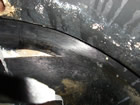 Photo: First split with mortar
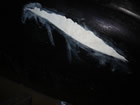 Photo: First split with putty
 Photo: First split with gel
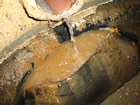 Photo: Second split
 Photo: Second split with mortar
 Photo: Second split with grp
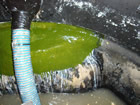 Photo: Second split with gel